 Did you always wondered why the eyes pop out in the pro-photos, and are completely flat in your own photos ? Well it is because of some simple post-processing technique. The idea is to locally enhance the sharpness of the eyes. Here is how it is done. Take the following photo and open it with your favorite photo editing software. I suggest you to use GIMP as free software, or any other paying software (sorry no publicity if they do not give me any money).
Copy the layer, and apply the Unsharp mask. (under gimp it is found in the Filter->Enhance). Use quite high values for the Radius and Amount
You now have two layers. The lower one is the original photo, and the one above is the enhanced one. Now add a mask layer on the top photo, and use black for full transparency. This means that even though you have 2 layers, you see the one below. Choose the paintbrush tool, and white color. If you have a tablet, be sure to adapt the opacity as function of pressure. If not, then do not choos white co
 lor for the brush, but a gray, about 20%.
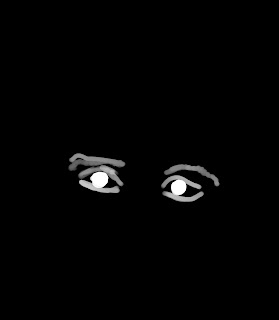
Begin to paint around and inside the eyes. At all the positions you paint in white (gray) the upper layer will be shown, and for the rest you keep the lower layer. Hence only the eyes will show sharpened and not the rest. Here is how the final mask looks like

Finally the image looks like that. Just turn on and off the visibility of the upper mask in order to see the result. See how the eyes pop-up ? So easy. So remember always Post-Process


